Patchwork blanket

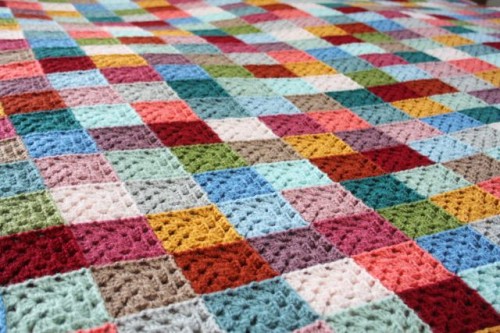
Again I let myself get tempted to start something new, even though I had planned to first finish some of my WIPs. But be honest, would you be able to resist this?

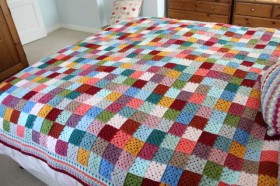
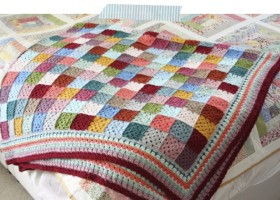
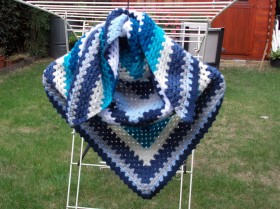
Sandra – Cherryheart’s Giant Granny Patches


Isn’t it gorgeous? And such beautiful colours. I for one couldn’t resist and dived in my stash.

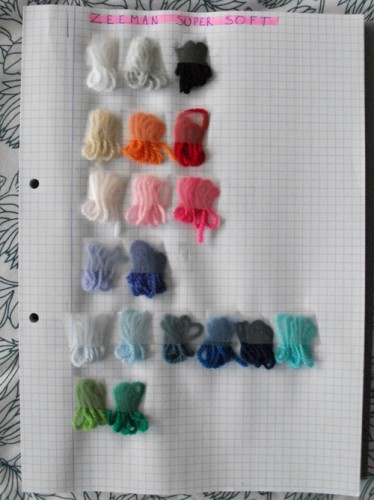
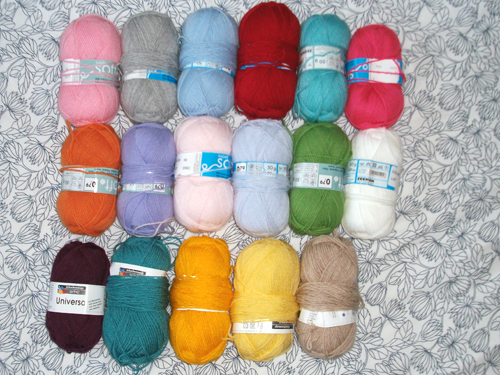
For a while now I have been looking for a project that could make a dent in my HUGE stash of Zeeman Supersoft yarn. I have two huge bags full of that yarn. I haven’t really dared counting the skeins yet, but if you know I have at least two skeins of each colour below, then you can do the math yourselves.

However, for the blanket that I wanted, I found the Zeeman colours inadequate. I missed something, such as yellow. So I had to find a yarn that could be used together with the Zeeman SuperSoft AND that had a good range of colours.
I asked around a bit, which yielded some suggestions, but either the yarn did not have the colours I wanted, or I couldn’t get my hands on it here (or at least not on short term : D ). Pity.

This weekend I hit the Veritas (the only shop in my town that sells brand yarns) with the small hope I’d find something useful. What I found was Schachenmayr SMC/Nomotta yarn. Across the whole store I found 2 colours of Universa and several colours of Bravo, because this one was on sale (€1 instead of €1,25).

What to do, what to do? I had already used the Bravo together with the Zeeman Supersoft in two previous projects.


In both projects the collaboration of Zeeman and Bravo was very successful, but in the store I had fallen in love with one of the two Universa colours. Moreover, in thickness the Universa resembles the Supersoft more.
Serious dilemma. I probably pondered in front of the small wall of yarn for 15 minutes. Grab a skein, put it back, grab another skein, put it back, …

Eventually I made my decision: I bought the Universa colour I loved (I would regret it later anyway), together with 4 colours of Bravo.

At home I displayed all chosen colours (Zeeman and other) for the Patchwork blanket and approved.

The bottom row shows the Universa and 4 Bravo’s

And then to work!
First I wanted to know how big I would make the quilt. I want a second TV blanket, so I would use my current TV blanket as a guidance.
My current TV blanket is still perfectly fine, but a second can never hurt ;) . My TV blanket has one of those pockets at the bottom to put your feet in. GENIUS! I love the idea of the pocket and will try to recreate it with this blanket. This means I should make the blanket approximately 119cm wide and 128cm high, plus another 33cm for the pocket. In total, the blanket should be approximately 119x161cm. When it’s finished, I would sew over approcimately 33cm for the pocket.

Secondly, which crochet hook would I use and what size squares does that yield?
I always use a 3,5mm hook for the Zeeman Supersoft, so I don’t think I should deviate from that. I made a little test square of 4 rounds, which has an aproximate size of 7cm².

With the above details I could figure out that I would need a blanket of 17 squares wide and 23 high, totalling on 391 squares!
Phewie, this should be fun ;)

But today I received a visit of The Big Hesitation.
Everything went great with my first 3 squares in Universa and Zeeman, but square 4 was made from Bravo. Was it me or was the Bravo square considerably larger? Hmm, let’s try adding another Zeeman square.

Yes, the Bravo-square was bigger than the others.
Shit! What now??? My plan completely ruined :(

Okay, calm down, try again. What if I continued using the 3.5mm hook on the Bravo, but used a 4mm with all the other yarn. Would it make a difference???

Alright, alright, it already looks better. Or doesn’t it? Now the Universa seems a bit small, don’t you think? Argh, I don’t know!!

What should I do? Continue as I am now? Or do I scratch the project and by consequence expand my stash instead of reduced it :lol: ?
What do you think?

Cheers,
The Big Hesitater.

Pattern: Hearts Blanket

Hello all!

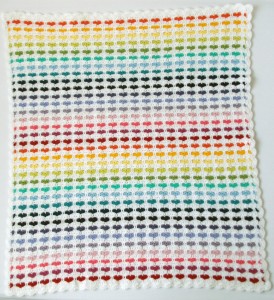
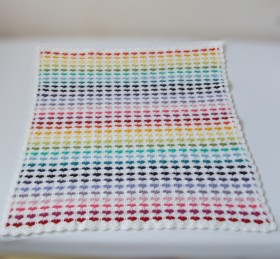
As you can see, I’m back from vacation and here to give you the reason why you probably all visit me ;) : the translation of the popular post explaining how to make the hearts blanket.


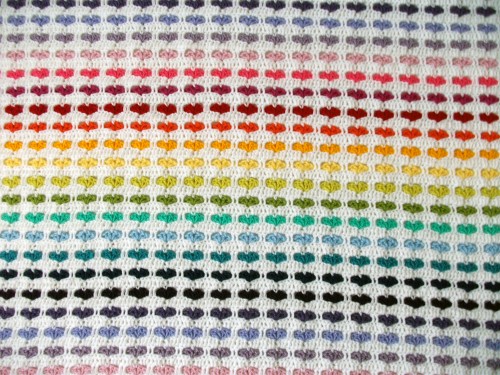
I must say I’m quite overwhelmed by all the attention my rainbow heart blanket has been (and still is) receiving on the interweb. I’ve been receiving countless comments, compliments and questions about the pattern. Thank you for that ^_^ !
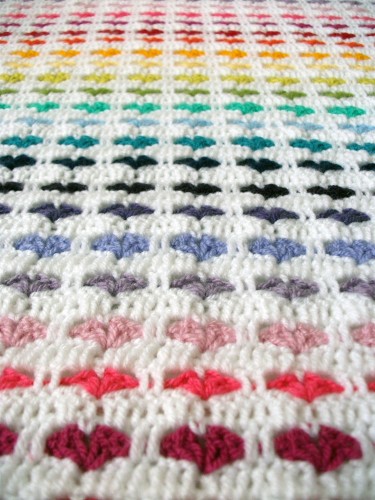
As I mentioned before, in my Dutch post, I am not the creator of this pattern. The original pattern belongs to Mary Ann Frits and you can find the original instructions here. I found the original hard to understand and it did not contain instructions to make a different size blanket, only a default sized blanket with a 169 staring chain. That’s why I decided to convert the written instructions into a symbolic crochet chart. To be able to do this, I enlisted the help of some lovely ladies on Ravelry and with unified forces we cracked the formula. Sometimes crochet is just like a puzzle :D

Because not everyone feels comfortable using crochet charts, I also made a picture tutorial to get you going with the pattern. So without further ado, here’s the translation of the original Dutch tutorial!

TUTORIAL

REMARK: This tutorial is written using US crochet terms. So when I say for example double crochet, this is a UK triple crochet!

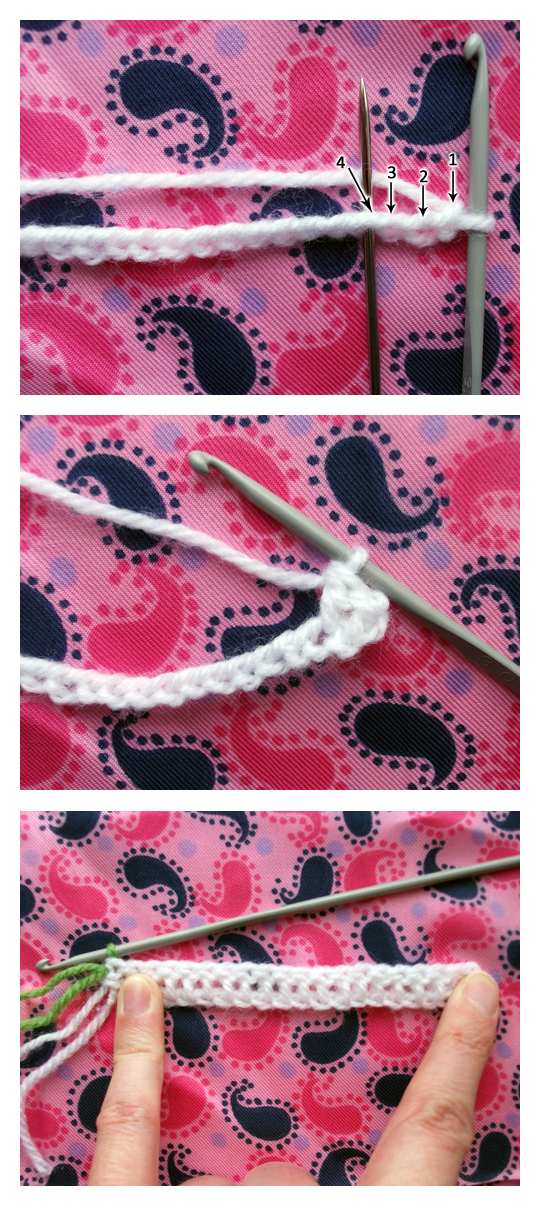
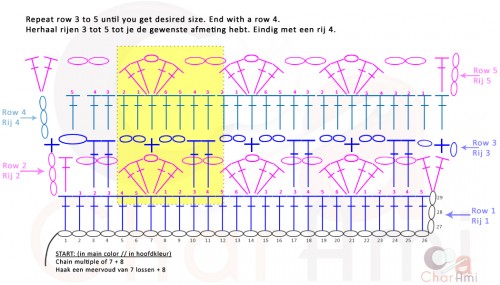
To begin your blanket (or whatever) you need to start with a basic chain. For this project you’ll need to crochet a chain of a multiple of 7 chain stitches plus another 8 chains for the beginning and turning.

FORMULA: 7x+8

For example, if you would like 20 full hearts spanning the width of your blanket, like I have in mine, you’ll need to chain 7 x 20 = 140 chain stitches PLUS 8 = 148 chain stitches.
For this tutorial, I’ll make a swatch of 2 full hearts, so we’ll start chaining (2x7) + 8 = 22 chain stitches.
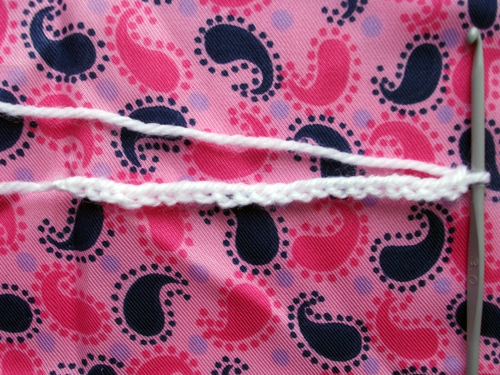
The beginning needs to be crocheted in your main colour. In my case this is white.

In the above picture I crocheted a chain of 22.
Small tip: I always use a bigger crochet hook for the starting chain than the one I use for the main project. This way I assure that my chain isn’t too tight. For my blanket, I chained with a 5mm hook, while I used a 4mm for the rest of my project.

Okay, let’s continue with the first row, still using your main colour.

ROW 1:

DOUBLE CROCHET (=DC) in the 4th chain from the hook, and in each chain until the end. At the last DC, change to your first hearts colour.

For the swatch we now crocheted 19 DC (as we skipped the first 3 chains!)

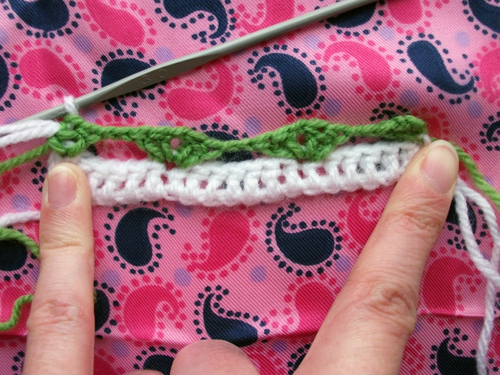
ROW 2:

Using a hearts colour, CHAIN 3 and turn (ch 3 equals one DC).
DC in the first dc, CH 2. Skip the next 5 dc’s;
* in the next dc crochet [2DC, 1CH, 2DC], CH 2, skip next 6 dc’s;
repeat from * until you have 6 dc’s left. In the next dc work [2DC, 1CH, 2DC], CH 2, skip next 5 dc’s, work 2 DC in the 3rd chain of the skipped chains of the previous row. Change back to your main colour with the last DC.

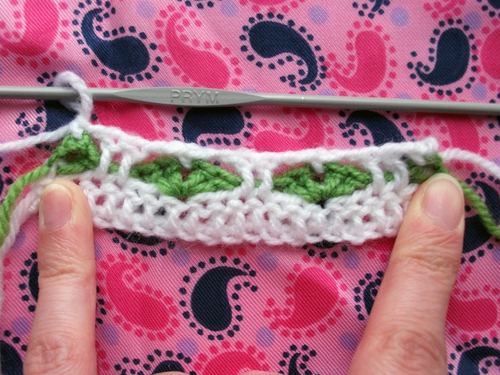
ROW 3:

Chain 1 and turn.
SINGLE CROCHET (= SC) in the first dc, CH 1, skip next dc.
Now you’ll need to crochet over the space of 2 chains, IN the skipped dc’s of the PREVIOUS row (so you’l be working OVER the colour, into the main colour): skip first dc, DC in the next 2 skipped dc’s of the previous row;
* CH 2, skip next 2 dc of the WORKING row, SC in ch1-space, CH 2, skip next 2 dc. In the ch2-space, skip in the PREVIOUS row 2 skipped dc’s, DC in the next 2 skipped dc’s of the previous row;
Repeat from * until the last ch2-space. Then crochet another CH and a SC in the top of the beginning 3 chain.

ROW 4:

CH 3 and turn.
DC in the next ch1-space and in the next 2 dc’s;
* 2 DC’s in the next ch2-space; DC in the next sc, 2 DC in the next ch2-space, DC in the next 2 dc’s;
Repeat from * until the last 2 dc’s. DC in the ch1-space and in the next sc. Change to a hearts colour with the last DC.

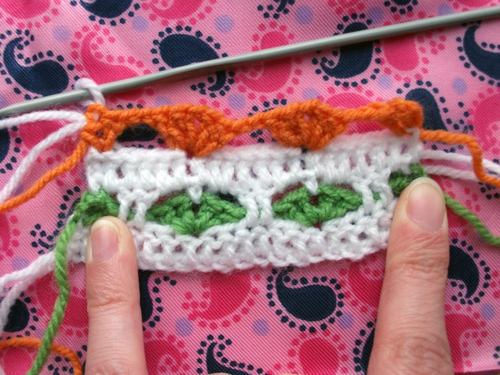
ROW 5:

CH 3 and turn.
DC in the first dc, CH 2, skip next 5 dc’s;
* in the next dc crochet [2DC, CH1, 2DC]; CH 2, skip next 6 dc’s;
repeat from * until there are 6 stitches left. In the next stitch crochet [2DC, CH1, 2DC], CH 1, skip next 5 stitches, 2 DC’s in the 3rd chain. Change to main colour with the last DC.

ROW 6 until the end

Repeat rows 3 to 5, until your blanket has the wanted size. Finish with a row 4.
Bind off, weave in all the ends (yep, there are, unfortunately, lots and lost of ends).

For clarification, here’s the schematic representation of the pattern (click to enlarge):

And that’s it! I hope everything is clear enough and enjoy making your own heart blankets!

Cheers,
Charlotte

Tutorial: Ministeck Join

Goodday to you all!

Today I shall try to explain to you, with lots of pictures and charts, how I joined my squares in my kaleidoscope blanket a.k.a. the ministeck join.

It really is a very easy and very quick method. Perfect to join hundreds of little squares ^_^ .
Important to know is that this join will only work with squares that have an uneven amount of stitches between the two corners. Apart from this restriction, there are no other restrictions on size or whatever :)

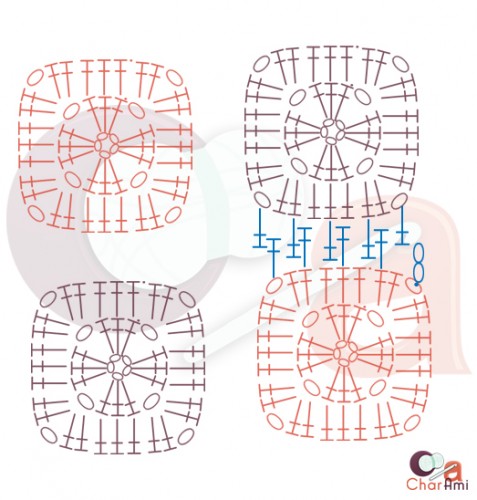
First, let me show you the schematic representation.

Remark: All crochet terms are in US terminology!

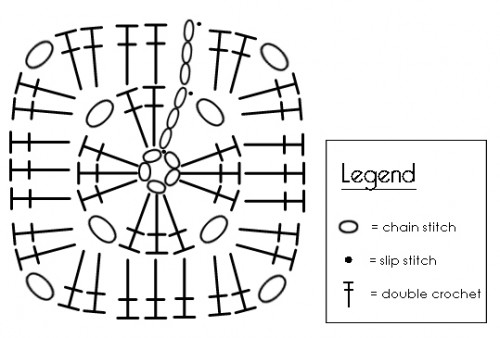
This is the chart for the square I used in my blanket (click the picture to enlarge).

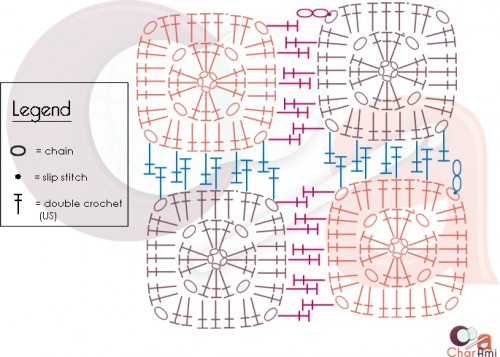
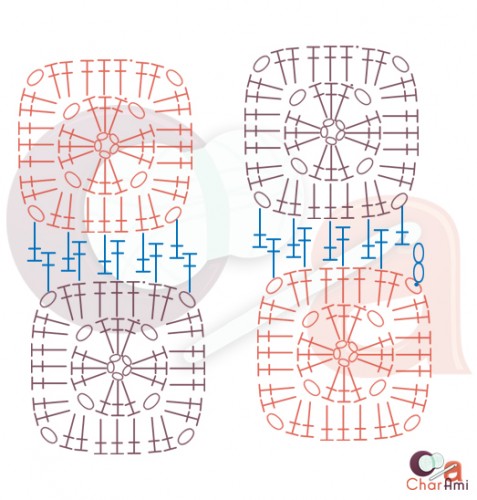
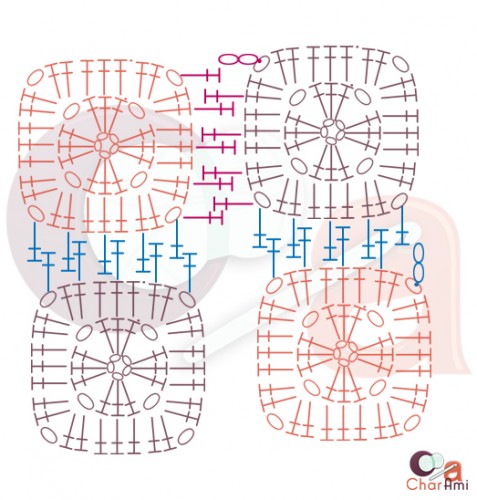
And this is the schematic representation of the ministeck join.

First, you will crochet the double crochets in blue, from right to left, starting in the upper right corner of the square on the bottom right. When you reach the end of the row, turn your work a quarter turn clockwise. This way the blue crochet join becomes a vertical join. And now, for the pink double crochets, you can continue in the same way as you did before.

For those of you that have difficulties to read charts like those above, I have also created a photo tutorial. I hope the pictures are clear enough.

In the photo-tutorial I will also be joining 4 squares, just like in the chart. If you understand how to join these 4 squares, you’ll be able to join millions ;) .

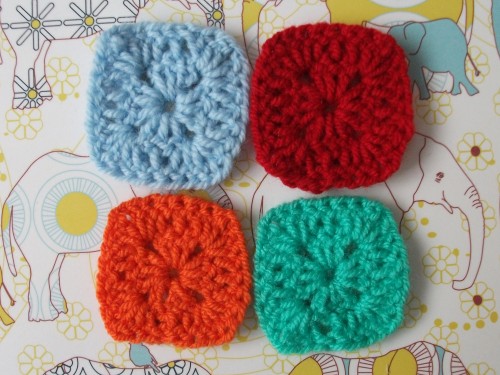
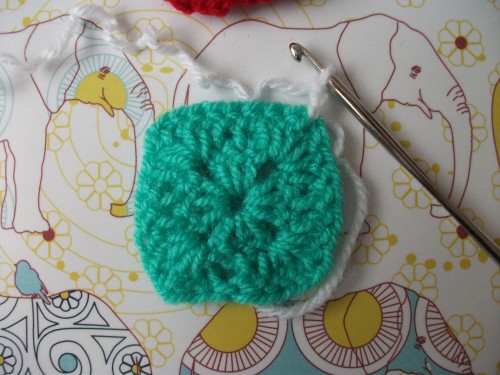
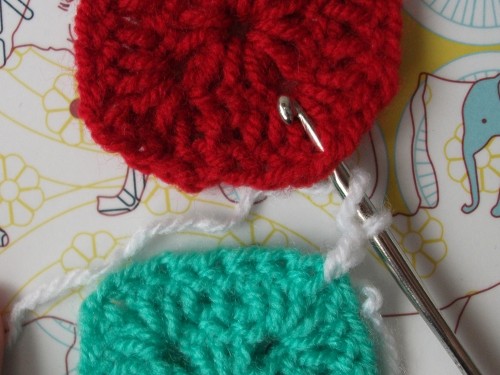
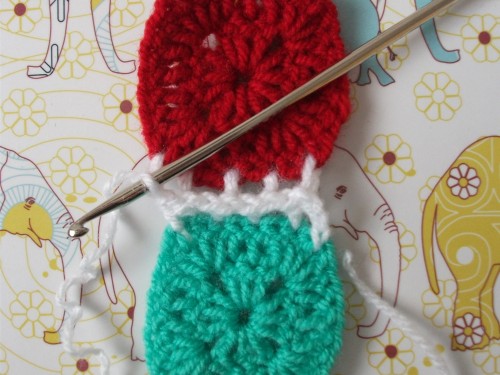
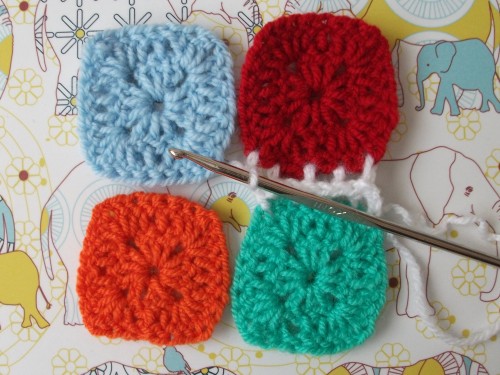
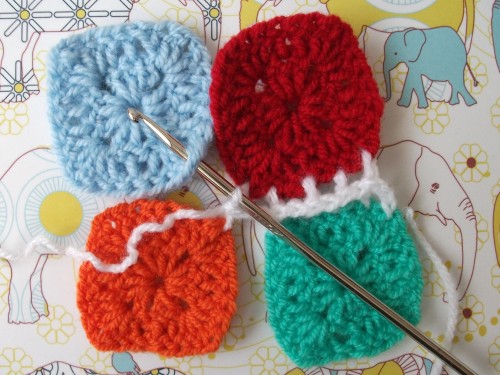
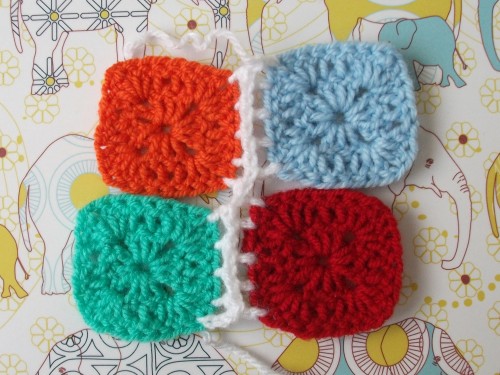
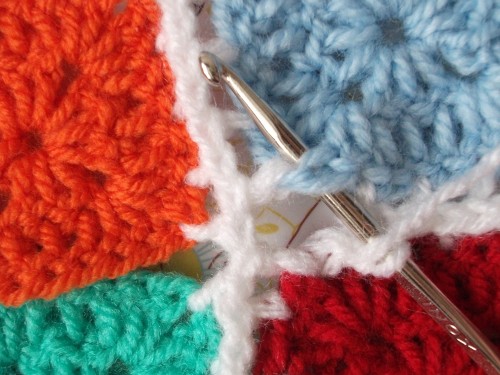
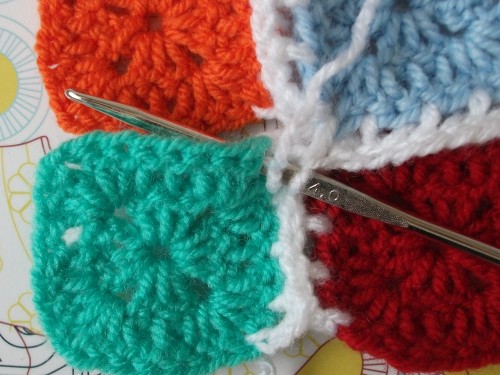
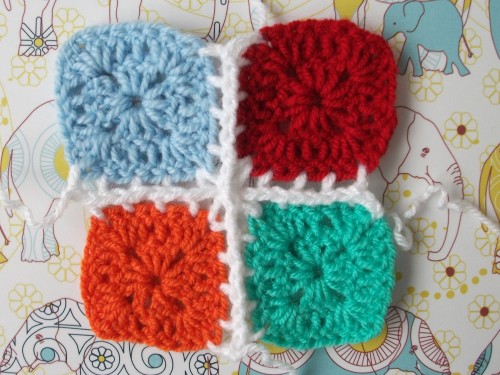
These are my squares. To start joining them, you need to start with the bottom right square. Join the yarn with a slip stitch to the top right corner of the square. Crochet 2 chain stitches (these count as 1 double crochet).

It’s important to know and to remember that while joing squares in the BOTTOM row, you need to insert your hook from the front to the back, while in the TOP row you will go from back to front.

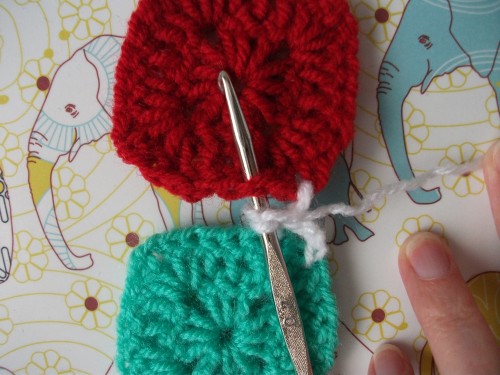
So, at this point we have joined our yarn to the first square and crocheted our first double crochet (namely 2 chains). Now we continue with the square at the top right (so here this is the red square). Yarn over, insert hook from back to front in the bottom right corner of the square.

Pull through, pull through two loops, pull through last two loops. Double crochet made.

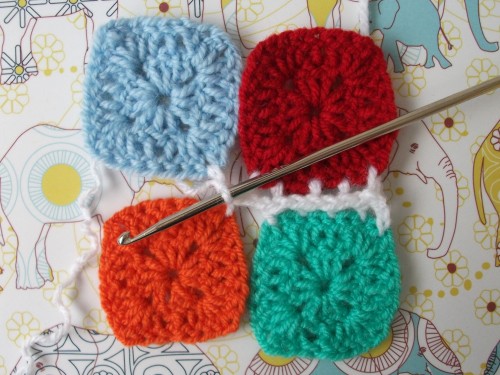
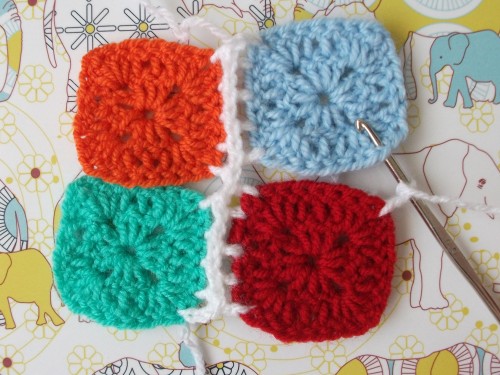
Now we return to the bottom square.
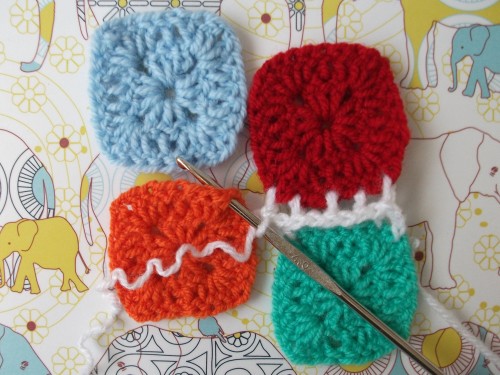
For this join we always start with a double crochet in the bottom square, followed by a double crochet in the top square in the same stitch as bottom square.

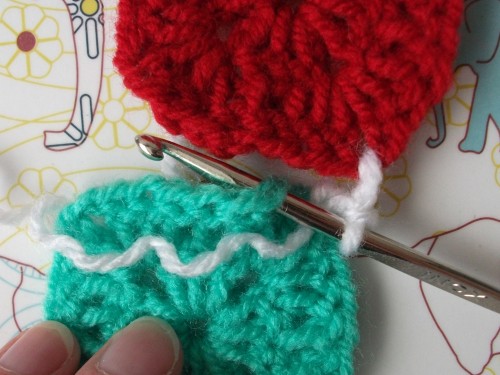
For the next double crochet we skip one stitch on the bottom square and crochet a double crochet in the next stitch, by inserting the hook from front to back.

Back to the top square. Also skip one stitch (so you always crochet double crochets in stitches that are opposite to one and other) and make a double crochet in the next stich by inserting your hook from back to front.

Again back to the bottom square: skip 1 stitch and make a double crochet in the next stitch. To the top square: skip 1 stitch and make a double crochet in the next stitch.
Continue in the same wat until you have made the final double crochet for these two squares in the bottom left corner of the top square.

Was this clear enough?
If we look at the chart again, than we have crocheted the following:

We started on the right with a slip stitch and two chain stitches in the corner of the bottom square. Then a double crochet in the corner of the top square. And then we kept alternating between the bottom and the top square, while skipping one stitch each time we crocheted a double crochet, until we reached the opposite corner of the top square.

Let’s continue with the next two squares.

Basically, we just continue in the same way as we established above, starting with the bottom square.
Crochet a double crochet in the top right corner of the bottom square.

Continue with a double crochet in the bottom right corner of the top square.
Don’t forget that you insert your hook from back to front when you crochet in the squares in the top row!

And just continue as you have with the first two squares: Each time, skip 1 stich, go from bottom to top, until you reach the opposite corner on the top row square.

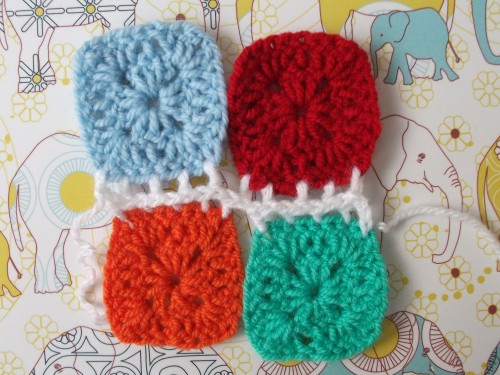
And you’ve finished your horizontal join!
Looking at the chart, we now finished crocheting the following:

If you have more than 4 squares (2 per row), just continue as set out above until you finished the horizontal joining.

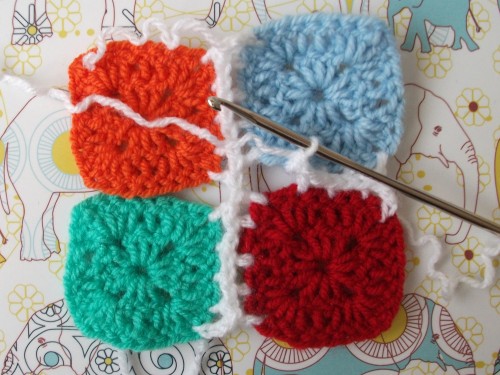
We are now ready to start the vertical joining. In essence, this joining is exactly the same as the horizontal one. For this end you need to rotate your work a quarter turn clockwise, so that your horizontal join becomes a vertical join.

Easy-peasy, you must know what to do now!
Attach the yarn with a single crochet in the top right corner of the bottom square and crochet 2 chain stitches (= 1 double crochet)

Subsequently go to the top square and crochet a double crochet in the corner. Again, insert your hook from back to front when crocheting in the top row!

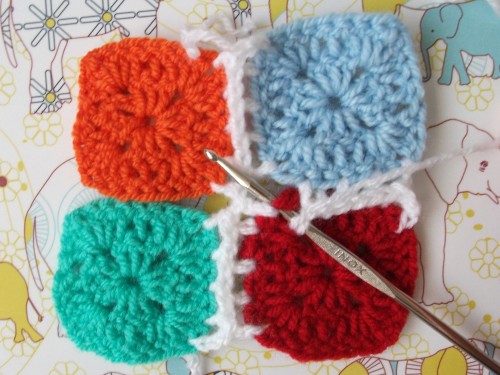
And I imagine you all thinking, “Buuut, what about the crossing?”

Short answer: don’t be bothered about it and just continue.
Long answer: start crocheting your last double crochet in the top left corner of the first square on the bottom. This double crochet will be on the right of the double crochet in the existing join.

Do the same in the last corner of the top square. Again, this double crochet will be on the right of the double crochet in the existing join.

Schematically we have now crocheted our first pink double crochets.

And now we continue with the next two squares.
Make a double crochet in the upper right corner of the next square in the bottom row, by just crocheting OVER the join. This double crochet will be on the left of the double crochet of the existing join.

And now you can continue without fault with joining the rest of the row.

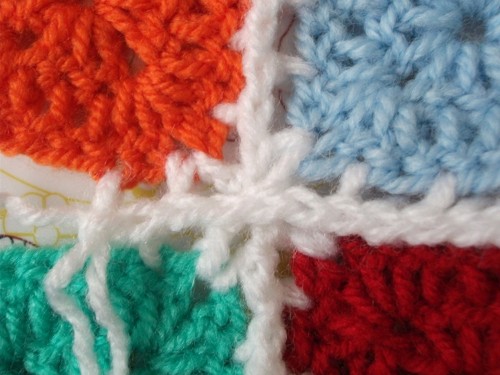
Here’s a close-up of the crossing over:

And this is the full join in both directions (see chart at the top)

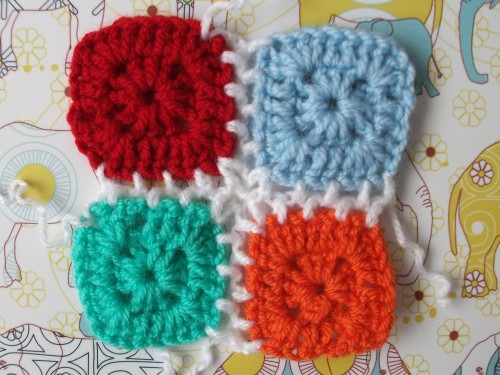
The back side of this join looks good too I think.

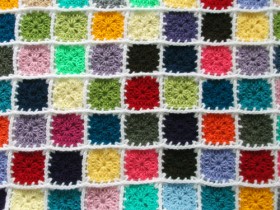
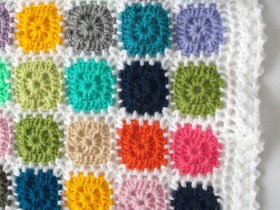
And this is the ministeck join used on the entire blanket (front and back)


Was this explanation understandable?
It wasn’t easy to put it down in words with al the tops and bottoms and lefts and rights … :P
If something isn’t clear, just let me know!

Cheers,
Charlotte