Goodday to you all!
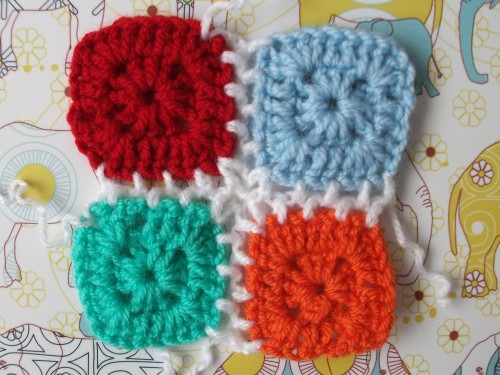
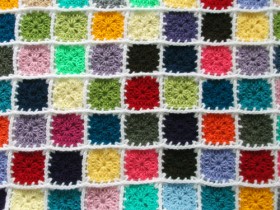
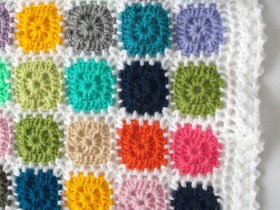
Today I shall try to explain to you, with lots of pictures and charts, how I joined my squares in my kaleidoscope blanket a.k.a. the ministeck join.
It really is a very easy and very quick method. Perfect to join hundreds of little squares  .
.
Important to know is that this join will only work with squares that have an uneven amount of stitches between the two corners. Apart from this restriction, there are no other restrictions on size or whatever 
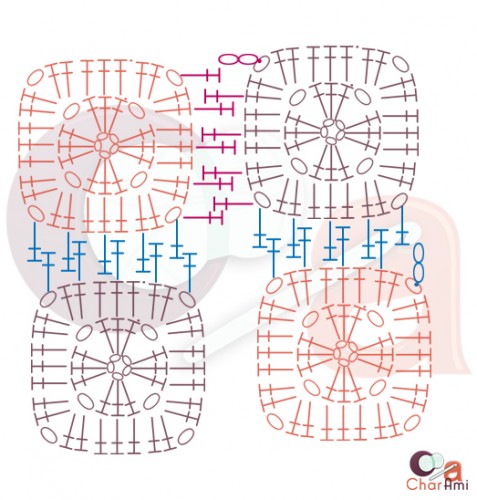
First, let me show you the schematic representation.
Remark: All crochet terms are in US terminology!
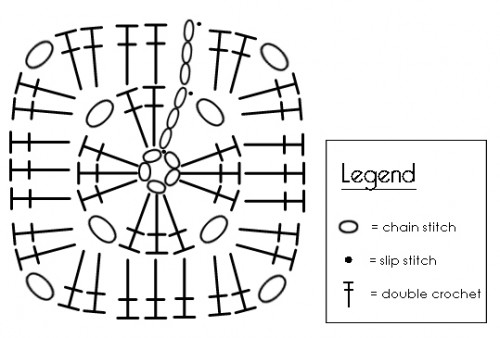
This is the chart for the square I used in my blanket (click the picture to enlarge).
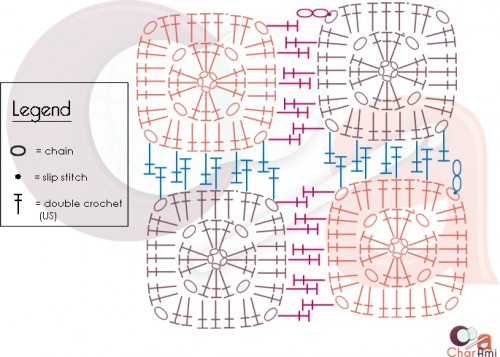
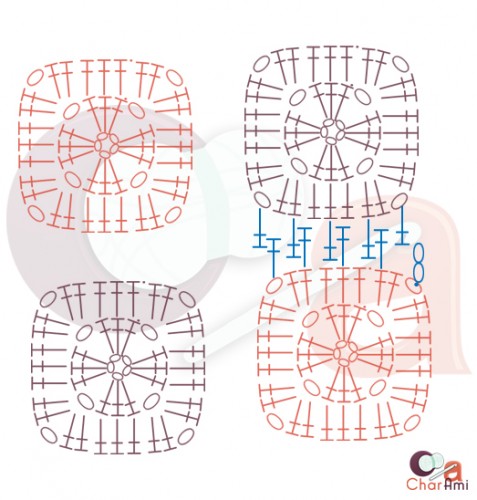
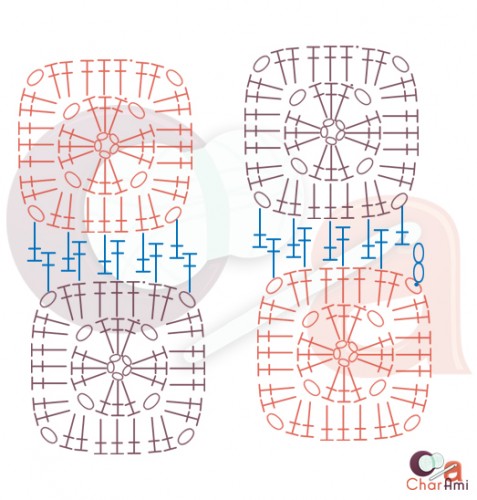
And this is the schematic representation of the ministeck join.
First, you will crochet the double crochets in blue, from right to left, starting in the upper right corner of the square on the bottom right. When you reach the end of the row, turn your work a quarter turn clockwise. This way the blue crochet join becomes a vertical join. And now, for the pink double crochets, you can continue in the same way as you did before.
For those of you that have difficulties to read charts like those above, I have also created a photo tutorial. I hope the pictures are clear enough.
In the photo-tutorial I will also be joining 4 squares, just like in the chart. If you understand how to join these 4 squares, you’ll be able to join millions  .
.
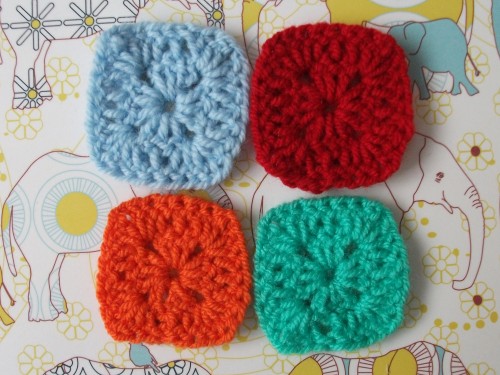
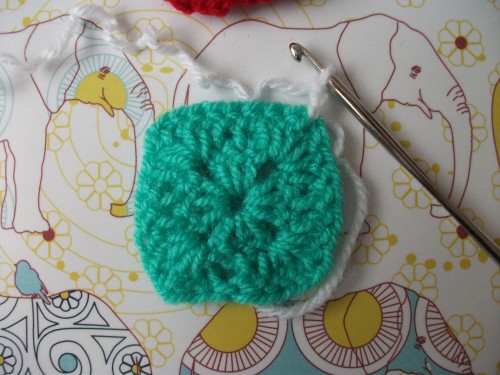
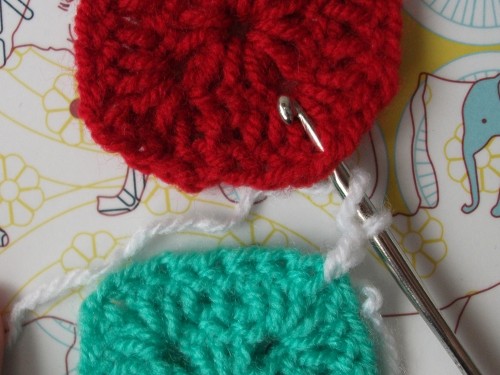
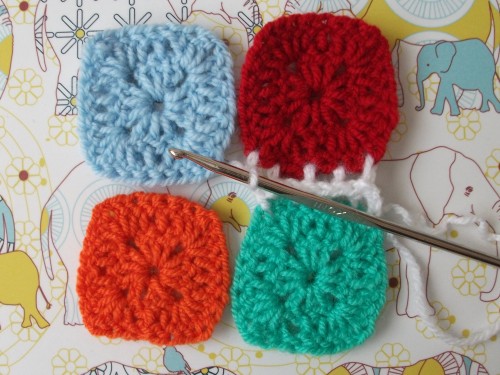
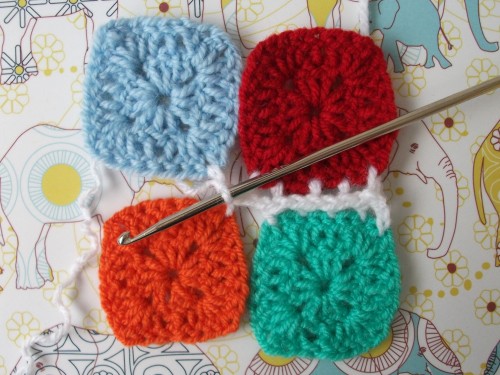
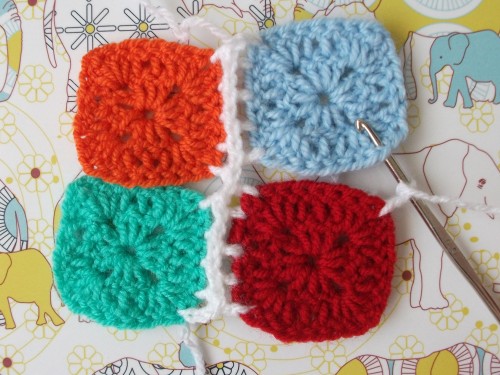
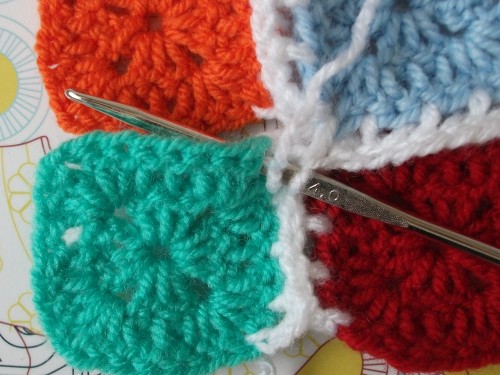
These are my squares. To start joining them, you need to start with the bottom right square. Join the yarn with a slip stitch to the top right corner of the square. Crochet 2 chain stitches (these count as 1 double crochet).
It’s important to know and to remember that while joing squares in the BOTTOM row, you need to insert your hook from the front to the back, while in the TOP row you will go from back to front.
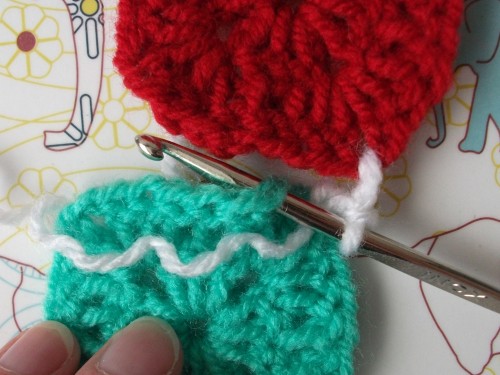
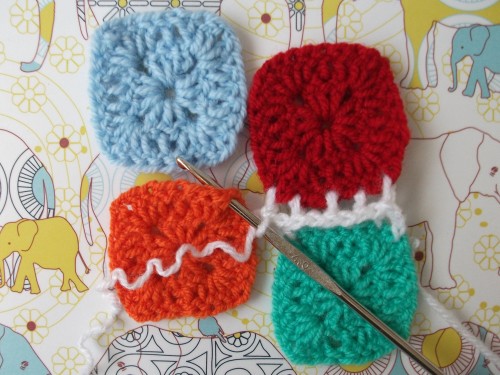
So, at this point we have joined our yarn to the first square and crocheted our first double crochet (namely 2 chains). Now we continue with the square at the top right (so here this is the red square). Yarn over, insert hook from back to front in the bottom right corner of the square.
Pull through, pull through two loops, pull through last two loops. Double crochet made.
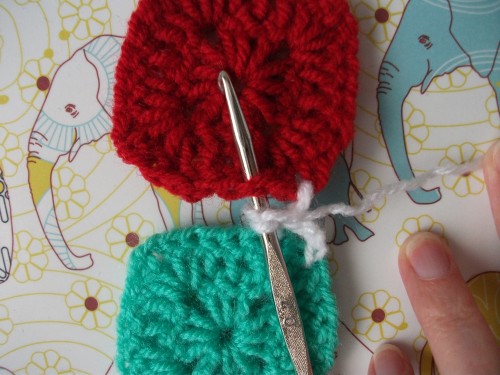
Now we return to the bottom square.
For this join we always start with a double crochet in the bottom square, followed by a double crochet in the top square in the same stitch as bottom square.
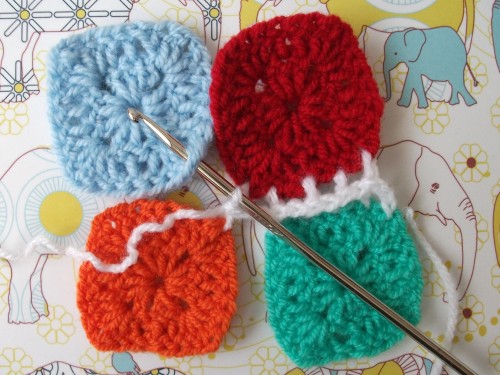
For the next double crochet we skip one stitch on the bottom square and crochet a double crochet in the next stitch, by inserting the hook from front to back.
Back to the top square. Also skip one stitch (so you always crochet double crochets in stitches that are opposite to one and other) and make a double crochet in the next stich by inserting your hook from back to front.
Again back to the bottom square: skip 1 stitch and make a double crochet in the next stitch. To the top square: skip 1 stitch and make a double crochet in the next stitch.
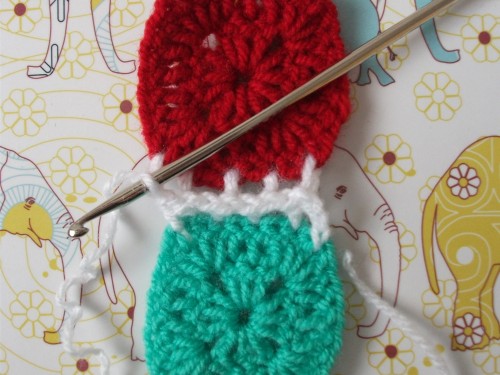
Continue in the same wat until you have made the final double crochet for these two squares in the bottom left corner of the top square.
Was this clear enough?
If we look at the chart again, than we have crocheted the following:
We started on the right with a slip stitch and two chain stitches in the corner of the bottom square. Then a double crochet in the corner of the top square. And then we kept alternating between the bottom and the top square, while skipping one stitch each time we crocheted a double crochet, until we reached the opposite corner of the top square.
Let’s continue with the next two squares.
Basically, we just continue in the same way as we established above, starting with the bottom square.
Crochet a double crochet in the top right corner of the bottom square.
Continue with a double crochet in the bottom right corner of the top square.
Don’t forget that you insert your hook from back to front when you crochet in the squares in the top row!
And just continue as you have with the first two squares: Each time, skip 1 stich, go from bottom to top, until you reach the opposite corner on the top row square.
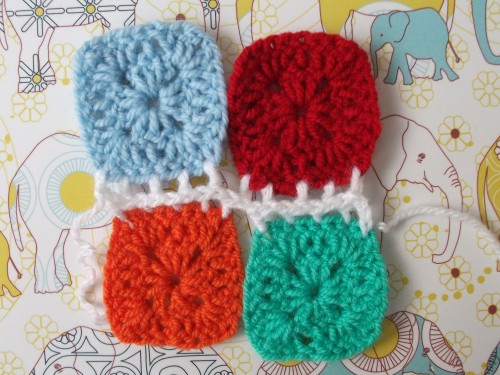
And you’ve finished your horizontal join!
Looking at the chart, we now finished crocheting the following:
If you have more than 4 squares (2 per row), just continue as set out above until you finished the horizontal joining.
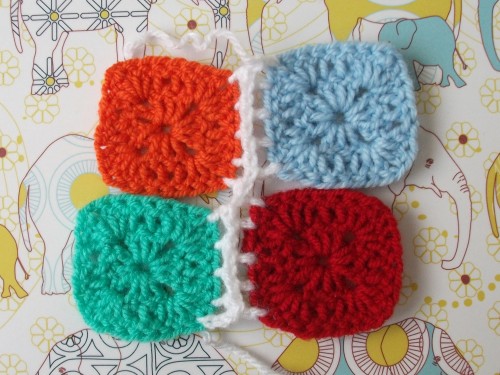
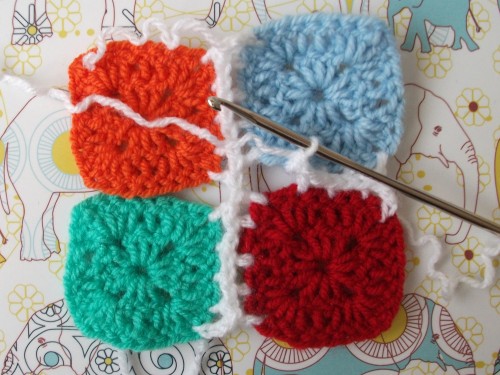
We are now ready to start the vertical joining. In essence, this joining is exactly the same as the horizontal one. For this end you need to rotate your work a quarter turn clockwise, so that your horizontal join becomes a vertical join.
Easy-peasy, you must know what to do now!
Attach the yarn with a single crochet in the top right corner of the bottom square and crochet 2 chain stitches (= 1 double crochet)
Subsequently go to the top square and crochet a double crochet in the corner. Again, insert your hook from back to front when crocheting in the top row!
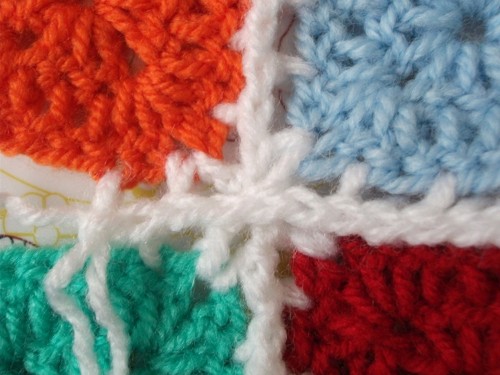
And I imagine you all thinking, “Buuut, what about the crossing?”
Short answer: don’t be bothered about it and just continue.
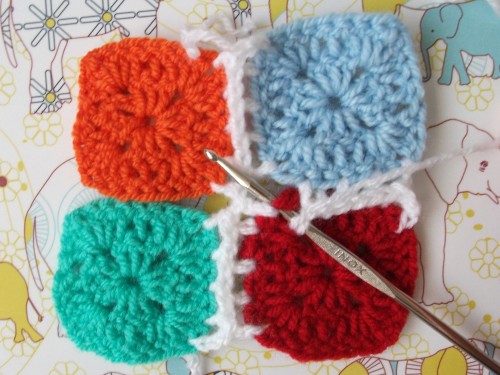
Long answer: start crocheting your last double crochet in the top left corner of the first square on the bottom. This double crochet will be on the right of the double crochet in the existing join.
Do the same in the last corner of the top square. Again, this double crochet will be on the right of the double crochet in the existing join.
Schematically we have now crocheted our first pink double crochets.
And now we continue with the next two squares.
Make a double crochet in the upper right corner of the next square in the bottom row, by just crocheting OVER the join. This double crochet will be on the left of the double crochet of the existing join.
And now you can continue without fault with joining the rest of the row.
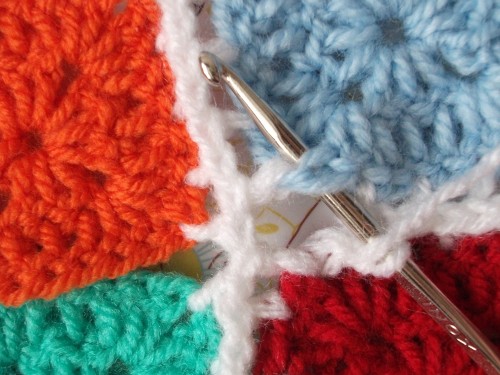
Here’s a close-up of the crossing over:
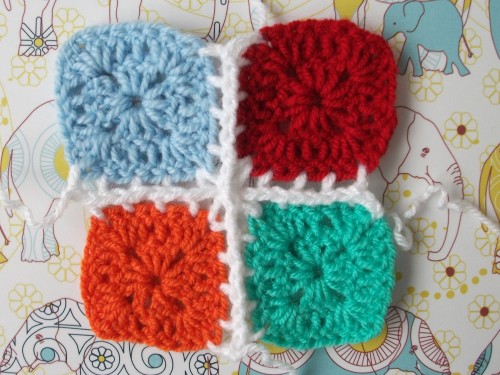
And this is the full join in both directions (see chart at the top)
The back side of this join looks good too I think.
And this is the ministeck join used on the entire blanket (front and back)
Was this explanation understandable?
It wasn’t easy to put it down in words with al the tops and bottoms and lefts and rights … :P
If something isn’t clear, just let me know!
Cheers,
Charlotte

